
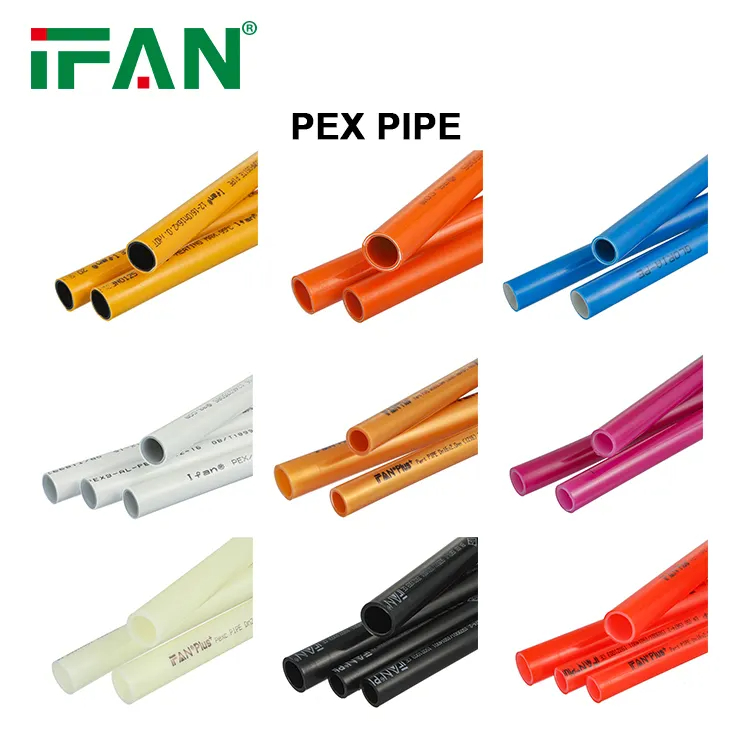
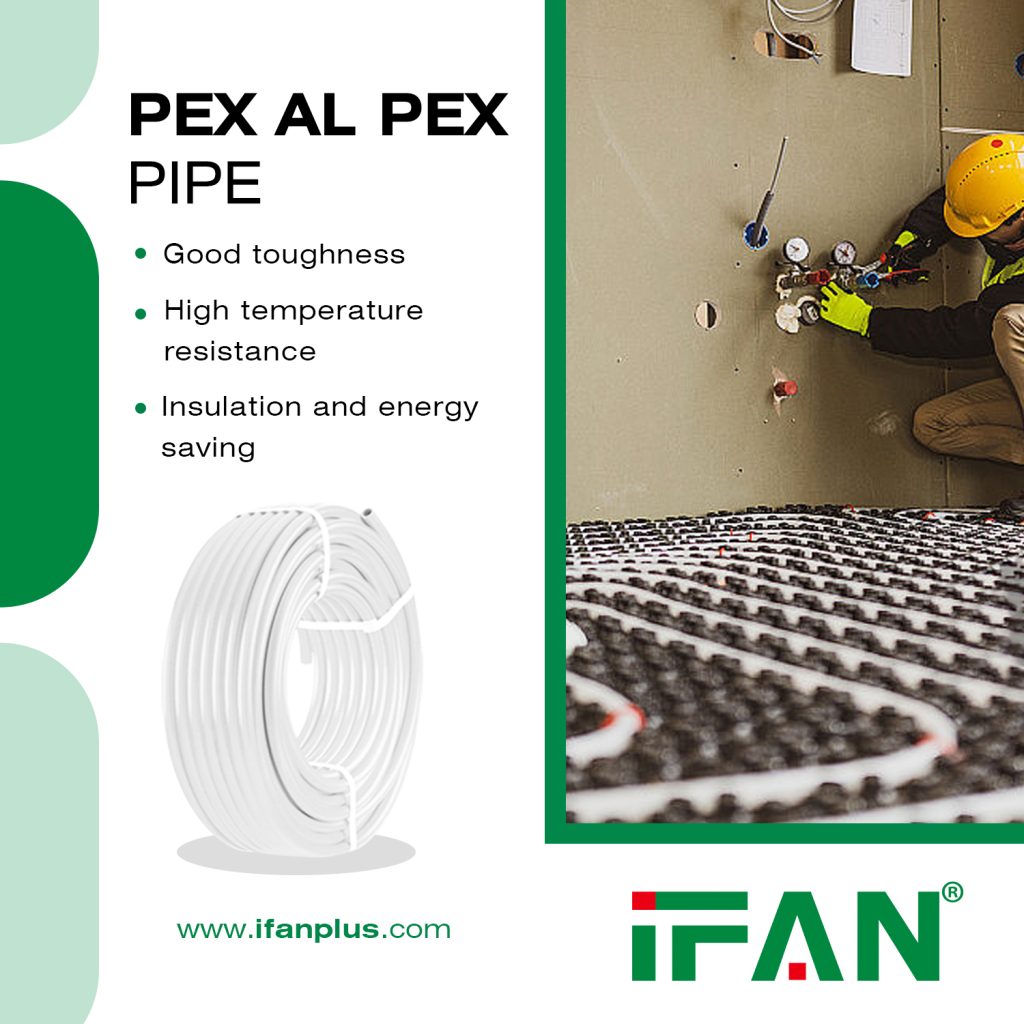
If you’re looking for a durable and flexible piping system that’s easy to install, PEX al PEX may be the perfect solution for your plumbing needs. This type of pipe is a multi-layer pipe made of cross-linked polyethylene (PEX) and aluminum. The combination of materials gives PEX al PEX pipe excellent properties such as high temperature and pressure resistance and corrosion resistance.
Installing a PEX al PEX pipe is relatively easy and can be done in a few simple steps. Here’s a step-by-step guide to help you get it done:
Step 1: Gather Your Tools and Materials
Before installing PEX al PEX pipe, you need to gather all the necessary tools and materials. Some of the tools you will need include a pipe cutter or saw, a crimping tool, a deburring tool, a measuring tape, and a marker.
The most important material you will need is the PEX al PEX pipe, along with the appropriate fittings and valves, such as couplings, elbows, and tees. It’s also a good idea to have some plumber’s tape on hand.
Step 2: Plan Your Design Layout
Before cutting any pipe, it’s essential to plan your design layout. Determine the configuration of your system, including the location of diverters and the path of the piping. Proper planning can save you time and money, and consulting with a professional plumber can ensure a high-quality installation.
Step 3: Measure and Cut the PEX Al PEX Pipe
Once you’ve gathered your tools and materials, measure and cut the PEX al PEX pipe. Use a measuring tape and marker to mark the length of the pipe you need. Then, use a pipe cutter or saw to cut the pipe to the desired length. Make sure to cut the pipe as straight as possible for a good fit with the fittings.
Step 4: Prepare Proper Fittings and Remove Burrs
It’s important to use fittings specifically designed for PEX al PEX pipes. Once your pipes are cut, remove any burrs or rough edges using a deburring tool or utility knife. Smooth edges ensure a good seal when crimping the fittings onto the pipe.
Step 5: Install the Fittings
Use a crimping tool to crimp rings onto the pipe and fittings, ensuring the ring is crimped evenly around the entire circumference of the fitting. Repeat this process for each fitting you need to install.
Step 6: Connect the PEX Al PEX Pipe to Valves
After installing all fittings, connect the PEX al PEX pipe to valves. Place a coupling over the end of the pipe, slide a crimp ring onto the pipe, insert the valve into the coupling, and use a crimping tool to secure the ring.
Step 7: Turn Off the Water and Prepare for Testing
Before testing your system, ensure the water supply is turned off. This prevents any accidental water flow during the installation process.
Step 8: Run a Pressure Test
Once all pipes and fittings are installed, pressure test the system to check for leaks. You can perform either a compressed gas test or a hydrostatic test. Ensure the system holds at the standard pressure for 15 minutes to confirm there are no leaks.
Testing with Compressed Gas
- Connect an air compressor to the open end of the PEX tubing.
- Gradually increase air pressure to 50 psi and monitor for any pressure drop.
Hydrostatic Testing
- Connect the water pressure gauge to the PEX tubing.
- Turn on the water supply and ensure the gauge reads 50 psi, maintaining this for 15 minutes.
Step 9: Insulate the Pipes
For added efficiency and protection against freezing, insulate the PEX pipes, especially in areas exposed to cold temperatures. Foam insulation tubing is a cost-effective option that can be easily installed.
Step 10: Turn on the Water Supply
Once you’ve confirmed there are no leaks and the system is insulated, turn on the water supply. Check for any leaks, and if everything is working properly, you’re done!
By following these steps, you can install your new PEX al PEX pipe with confidence, ensuring a durable and flexible plumbing system.
Connect
IFAN is a Chinese manufacturer of plastic pipes, fittings and valves with 30 years of experience. If you are interest in IFAN copper fittings, copper valves, plastic pipes and fittings, please contact us. IFAN offers you a variety of standard pipes to meet your specific needs. Click below to learn more about IFAN’s wide range of affordable and cost-effective valve products and piping system related products.
We will reply your email or fax within 24 hours.
You can call us at any time if there is any question on our production.
For more information,pls visit our webside https://www.waterpipefactory.com/
Pls Mailto: [email protected]
Whatsapp: + 86 152 1588 7738
How can you test Pex pipe installations for leaks?
How to Test PEX Pipe Installations for Leaks
When installing PEX pipes, it’s crucial to perform a pressure test to ensure the integrity of your plumbing system. Here’s a step-by-step guide on how to conduct this test using two reliable methods—Compressed Gas Testing and Hydrostatic Testing.
Compressed Gas Testing
This method involves using air to check for leaks:
- Preparation: Connect both the hot and cold lines of your water tank, ensuring they are linked correctly. Secure the ends of the PEX tubing with end caps but leave one set open in the kitchen.
- Set Up Equipment: Attach an air compressor to one open PEX tube. Hook up a pressure gauge to the other tube.
- Testing: Turn the air compressor on and carefully increase the pressure in the pipes to 50 psi, monitoring the gauge as you go.
- Monitor Pressure: After turning off the compressor, observe the pressure gauge for 15 minutes. Ideally, the pressure should remain at 50 psi. If the pressure drops, there is a leak to be addressed. Use a soap and water mixture to locate the leak, fix it, and retest.
- Completion: If the pressure holds steady, the PEX pipes are secure, and you can turn on the water supply.
Note: Always follow guidelines from relevant plumbing codes, like those found in local or national regulations, which might stipulate testing standards.
Hydrostatic Testing
This method uses water for leak detection:
- Connect Lines: Like the gas test, link the water tank’s hot and cold lines and cap the PEX tubing ends, leaving one open.
- Attach a Gauge: Connect a water pressure gauge to the open PEX tubing.
- Initiate Water Flow: Open the main shut-off valve to allow water to flow at full pressure. Observe the gauge to reach 50 psi, which is the typical pressure for PEX pipelines.
- Check Pressure: Let the water pressure stabilize for 15 minutes, watching for any drop that could indicate a leak. If necessary, use an air compressor to supplement if the property’s water pressure is below 50 psi.
- Leak Detection and Repair: If pressure drops, inspect for water escaping at any joint or fitting. Repair the identified leak and conduct the test again.
- Final Steps: Once the pressure is stable, the plumbing system is safe to use.
Both methods are effective for verifying the durability of PEX installations. Properly conducted, they ensure your water system is leak-free, saving you from potential water damage and costly repairs.
How should Pex tubing be placed during installation?
To correctly lay PEX tubing, start by connecting it to either a water supply manifold or directly to the main water line, which is often made of copper. This decision will depend on your specific design plan.
1. Start from the Source:
Initiate the installation from the chosen water source or manifold, ensuring all connections are secure.
2. Place with Precision:
Next, position the first section of PEX tubing according to your predetermined layout. This ensures efficient water distribution throughout the system.
3. Secure the Tubing:
Use half clamps to anchor the PEX to walls or studs. Proper clamping prevents movement and reduces the risk of damage or leaks.
What additional tips should be considered for Pex pipe installation?
Key Considerations for PEX Pipe Installation
When undertaking a PEX pipe installation, there are several key tips to ensure a successful and long-lasting setup:
- Select the Right Tools
PEX installations require specific tools such as PEX cutters and crimping tools. These are crucial for accurate cuts and secure connections, reducing the risk of leaks or damage during installation. - Protect from UV Exposure
PEX pipes are vulnerable to UV light, which can degrade the material over time. If the installation site is outdoors or exposed to sunlight, safeguard the pipes with insulation or UV-resistant coverings to prolong their lifespan. - Choose Suitable Fittings
Always use fittings designed specifically for PEX systems. Mismatched or incompatible fittings can lead to leaks or system failures. Investing in the right fittings is essential for a durable installation. - Adhere to Local Regulations
Compliance with local building codes and regulations is non-negotiable. Obtain necessary permits and ensure that your design meets all standards to avoid legal issues and ensure safety. For Philadelphia-specific regulations, consult local resources or visit their online code viewer. - Consider Professional Installation
If the project is beyond your skill level or requires complex procedures, hiring a licensed professional is advisable. They bring the expertise needed to ensure the installation meets all safety and operational standards.
By following these guidelines, you can achieve a reliable PEX piping system that stands the test of time.
How do you safely turn off and drain water before installing Pex pipes?
How to Safely Turn Off and Drain Water Before Installing Pex Pipes
Installing Pex pipes safely starts with ensuring there’s no water left in the system. Here’s a step-by-step guide to help you through the process:
- Locate the Shut-Off Valves
Start by finding the shut-off valves. Your home might have both branch-specific valves and a main shut-off valve. For localized work, use the branch valve that controls water flow to the specific area you’re upgrading. If you’re unsure, or for broader repairs, turn off the main shut-off valve.- Draining the System
To fully drain the pipes, open a faucet on the lowest level of your home, such as in the basement or main floor. This allows trapped water to escape due to gravity, clearing the pipes of any residual water.
By carefully following these steps, you can avoid water mishaps and prepare your plumbing system for the installation of Pex pipes effectively.
Why is it important to insulate Pex pipes, and how is it done?
Why Insulate Pex Pipes?
Insulating Pex pipes is crucial for several reasons. First, it helps minimize heat loss, ensuring that hot water stays hot while traveling through the pipes. This not only improves the efficiency of your heating system but also lowers energy bills. In colder climates, insulation is vital to prevent pipes from freezing, which can lead to costly damage and repairs. Moreover, by maintaining the right temperature, insulation promotes the overall performance and longevity of the piping system, especially in vulnerable areas like crawl spaces, attics, or outdoor environments. Typically, pipes located within heated living spaces might not require insulation.
How to Insulate Pex Pipes
Materials Needed
A popular and affordable option for insulating Pex pipes is foam insulation tubing. These tubes are:
- Available in various sizes to fit different pipe diameters.
- Designed with a slit for easy wrapping.
Installation Steps
- Measure and Cut: Determine the length of pipe you need to insulate. Use a knife or scissors to cut the foam tubing to the appropriate length.
- Wrap the Pipe: Open the slit in the foam tube and place it around the pipe.
- Secure the Insulation: Fasten the foam tubing every foot with insulation tape, ensuring a snug fit.
By following these steps, you enhance the thermal efficiency of your Pex piping system, reducing energy consumption and protecting against potential damage from freezing temperatures.
Why might it be beneficial to hire a licensed professional for Pex pipeinstallation?
Opting for a licensed professional to handle your Pex pipe installation comes with several significant advantages.
- Expertise and Experience
- Licensed professionals bring a wealth of experience to the table. They have tackled various installation scenarios, ensuring they can efficiently handle any complexities your project may present.
- Proper Installation
- With a professional, you can rest assured that the installation will comply with necessary safety standards and industry codes. This reduces the risk of future issues like leaks or system failures.
- Specialized Tools
- Professionals have access to all the specialized tools required for efficient Pex pipe installation, saving you the hassle and cost of purchasing or renting equipment.
- Time and Cost Efficiency
- Mistakes made during DIY installations can be costly and time-consuming to fix. A skilled professional can complete the job promptly and accurately, preventing unnecessary expenses down the line.
- Warranty and Assurance
- Professionals often provide warranties for their work, offering you peace of mind. Should any issues arise, you’ll have support from someone who is accountable for their quality of service.
In summary, hiring a licensed professional ensures a smooth and efficient installation process, saving you both time and potential headaches.
How is hydrostatic testing performed on Pex pipes?
Performing Hydrostatic Testing on Pex Pipes
Hydrostatic testing is essential to ensure your Pex pipes are leak-free and can handle the necessary water pressure. Here’s a step-by-step guide to performing this crucial test:
- Prepare the Plumbing System
- Start by connecting the hot and cold lines of the hot water tank together to form a closed loop.
- Seal the Pex Tubing
- Use Pex end caps to seal all but one of the tubes. Leave a single line open in the kitchen for testing.
- Attach the Pressure Gauge
- Connect a water pressure gauge to the open Pex line to monitor pressure levels accurately.
- Initiate Water Flow
- Turn on the main water supply, allowing water to flow through the system at maximum force. Keep an eye on the pressure gauge needle, which should ideally reach 50 psi—this is the standard pressure for Pex pipelines.
- Adjust for Pressure Variability
- Note that your property’s water pressure could be below 50 psi. In such cases, low pressure might be due to the water supply rather than plumbing issues. Use an air compressor to boost the pressure to 50 psi if needed.
By following these steps, you can confidently ensure your piping system is robust and leak-free.
How do you plan the design layout for Pex pipe installation?
How to Plan the Design Layout for Pex Pipe Installation
Planning the design layout for Pex pipe installation is a crucial step that can ensure efficiency and cost-effectiveness in your project. Here’s how you can do it:
- Assess Your Space
Start by taking a detailed look at the area where the Pex pipes will be installed. Measure and sketch a blueprint of your space. This preliminary mapping will help you visualize the best routes for your piping. - Choose Your Configuration
Consider the layout that best suits your needs—traditional trunk-and-branch systems, which mimic conventional pipe layouts, or home-run systems, which run directly from a manifold to each fixture. Each configuration has its pros and cons depending on the complexity and length of your system. - Select the Right Components
Decide on the type of diverters and fittings you’ll need based on your configuration choice. This includes valves, elbows, and tees that will help direct the flow of water exactly where it needs to go. - Plan for Water Distribution
Calculate the number of water lines needed, and determine the optimal routes to minimize potential pressure loss and ensure even water distribution. This involves balancing the pipe length and diameter across various sections. - Consult a Professional
If you’re unsure about any step in the process, it’s wise to seek advice from a professional plumber. An experienced professional can provide insights that prevent costly mistakes and ensure a high-quality installation.
By carefully planning each aspect of your Pex pipe layout, you can ensure your installation proceeds smoothly and performs effectively long term.
What are the local codes and regulations to follow when installing Pex pipes?
Understanding Local Codes and Regulations for PEX Pipe Installation
Before you embark on installing PEX pipes, it’s crucial to adhere to the local building codes and regulations specific to your area. These guidelines are designed to ensure safety, efficiency, and compliance within your plumbing project.
Steps to Ensuring Compliance:
- Research Your Local Building Codes: Every municipality has its own set of building codes that dictate the standards for plumbing installations, including PEX piping. Start by contacting your local building department or checking their website for detailed requirements.
- Obtain Necessary Permits: Certain installations may require permits. This ensures that your project is reviewed by local authorities and meets the specified safety and quality standards. Ignoring this step could result in fines or the need to redo the work.
- Consult with Professionals: It’s wise to consult with a licensed plumber or contractor who is familiar with local codes. Their expertise can help navigate any complexities and ensure that your installation passes any required inspections.
- Follow National Standards: Besides local codes, refer to national standards such as the Uniform Plumbing Code (UPC) or the International Plumbing Code (IPC). These provide additional guidelines and benchmarks for safe and effective installations.
- Stay Updated: Regulations can change over time. Regularly check for updates in local ordinances and adjust your approach accordingly to remain compliant.
By taking these steps, you’ll be ensuring that your PEX pipe installation is both safe and up to code, protecting your investment and maintaining peace of mind.
How can UV rays affect Pex pipes, and what can be done to protect them?
How Do UV Rays Affect Pex Pipes, and What Can You Do to Protect Them?
Understanding the Impact of UV Rays
Pex pipes, commonly used in plumbing for their flexibility and durability, can suffer significant damage from prolonged exposure to ultraviolet (UV) rays. UV radiation can weaken the material, causing it to become brittle and prone to cracking. This degradation compromises the integrity of the pipes, leading to potential leaks and failures over time.
Protection Strategies
To safeguard Pex pipes from UV damage, it’s crucial to implement protective measures, especially if they are installed in areas with high exposure, like outdoor settings or attics. Here’s how:
- Use UV-Resistant Insulation: Wrap the pipes with UV-resistant materials to shield them from direct sunlight. This not only helps in maintaining their functionality but also extends their lifespan.
- Install Pipe Covers or Enclosures: Protective coverings designed for outdoor use offer an additional layer of defense against UV radiation. These covers can also help in temperature regulation.
- Choose UV-Stable Products: When planning installations, opting for Pex products specifically designed with UV inhibitors can provide built-in protection, reducing the risk of damage.
By taking these preventive actions, you can ensure your Pex pipes remain efficient and reliable, even under challenging environmental conditions.
What are the steps for testing Pex pipes with compressed gas?
After installing your PEX water lines, it’s crucial to conduct a pressure test to confirm there are no leaks. Here’s a detailed guide on how to test PEX pipes using compressed gas:
Preparing the System
- Connect Lines: Join the hot and cold lines of the hot water tank to form a loop.
- Cap the Tubes: Seal off the ends of the PEX tubing with PEX end caps. Leave one hot and one cold water line open in the kitchen area.
Equipment Setup
- Attach Equipment:
- Connect an air compressor to one of the open PEX lines.
- Attach an air pressure gauge to the other open PEX line.
Conducting the Test
- Increase Pressure:
- Turn on the air compressor slowly and increase the air pressure in the PEX pipes until it reaches 50 psi.
- Note: Verify that the test pressure aligns with local plumbing codes and the working pressure of your system.
- Monitor the Pressure:
- Once at the desired pressure, turn off the air compressor.
- Observe the air pressure gauge for 15 minutes. A stable reading at 50 psi indicates success.
Identifying and Fixing Leaks
- Check for Leaks:
- If the pressure drops, a leak is present. Use a mixture of soap and water to find leaks—bubbles will form at the leak site.
- Repair any detected leaks and repeat the pressure test.
Finalizing
- Complete Test: Upon successfully passing the test with consistent pressure, you can activate your water supply and commence using your plumbing system.
This method ensures your PEX pipes are properly tested for integrity and safety before full operation.
What is the process for connecting Pex pipes using the cri
olno methoc?
Step 4: Install the Fittings
Begin by cutting the PEX al PEX tubing to the desired length using a PEX pipe cutter. This ensures a clean cut and proper fit for the fittings. Slide a crimp ring over the end of the tubing, positioning it ¼ – ⅛ inch from the end. This placement is crucial for a secure connection.
Insert the appropriate fitting into the end of the pipe. Use a crimping tool to crimp the ring onto the pipe and fitting, making sure the ring is crimped evenly around the entire circumference of the fitting. It’s important to use the crimp tool head corresponding to the size of the fitting; for example, if you are using a ½ inch fitting, the crimp head must also be ½ inch.
Verifying the Connection
Inspect the crimped connection using a go/no-go gauge to confirm the connection is tight and secure. If the connection has been made correctly, you should be able to slide the gauge over the fitting while seeing a gap between the top of the fitting and the gauge. If the gauge does not slide over the fitting or slides all the way down, the connection has not been made correctly and needs adjustment.
Step 5: Connect the PEX al PEX Pipe to Valves
After you’ve installed all the necessary fittings, it’s time to connect the PEX al PEX pipe to valves. Place a coupling over the end of the pipe and slide a crimp ring onto the end of the pipe. Insert the valve into the end of the coupling and use a crimping tool to crimp the ring onto the pipe and valve.
Repeat this process for each valve you need to attach to the PEX al PEX pipe, ensuring each connection is verified with a go/no-go gauge for reliability and safety.