
1. Understand Compression Coppaer Fittings
Compression copper fittings let you join copper pipes without heat or solder. These fittings use a nut, a ferrule (ring), and a fitting body. When you tighten the nut, it compresses the ferrule around the pipe. This creates a water-tight seal that holds under pressure. Use compression fittings for water supply, heating systems, and basic repairs. Choose the right size fitting for your pipe. Most homes use 1/2-inch or 3/4-inch pipes. Match the fitting type with your pipe’s wall thickness. Type L copper works best for most homes. Avoid mixing metals, which may cause corrosion. These fittings work best in accessible spots. Avoid hiding them inside walls or underground. You can reuse some fittings if undamaged. Learn the parts and how they function before starting. Read all manufacturer instructions. Always turn off the water before any installation. Use compression fittings only where local plumbing codes allow. Understand your materials and plan your work carefully.
2. Gather the Required Tools and Materials
You need the right tools to install compression fittings. Prepare an adjustable wrench, a pipe cutter, and a deburring tool. Also get an emery cloth, measuring tape, and a marker. Use safety gloves and protective glasses. Make sure your copper pipe is clean and round. Damaged pipes may leak or fail under pressure. Pick fittings that match your pipe’s diameter and thickness. Prepare some extra nuts and rings in case of error. Avoid hacksaws, which leave jagged edges. Use a proper pipe cutter for clean, square cuts. Emery cloth smooths the outer surface of the pipe. The deburring tool clears rough metal inside the pipe. A clean pipe surface helps the fitting seal better. Keep a towel or small bucket nearby to catch water. Always shut off the water and drain the pipes. Test your tools before starting. Organize all parts to avoid delays. With everything ready, your installation will go faster and smoother.
3. Measure and Cut the Copper Pipe
Start by measuring the pipe length you need. Use a measuring tape and mark the cut line. Use a pipe cutter to slice the copper pipe. Tighten the cutter slightly, then rotate it around the pipe. After every few turns, tighten the knob again. Continue until the pipe separates cleanly. Check for a clean, even edge. Smooth the cut with a deburring tool. Remove any sharp edges or metal fragments. Clean the pipe’s outside with an emery cloth. This ensures better contact with the fitting. Don’t use sandpaper, which may scratch or damage the copper. Make sure the cut pipe end is round. Flattened or bent ends will not seal properly. Measure twice before cutting to avoid mistakes. A pipe that’s too short won’t reach the fitting. One that’s too long might not fit in tight areas. Once the pipe is cut, cleaned, and deburred, move to the next step. Precision at this stage prevents future leaks and problems.
4. Slide On the Compression Nut and Ring
Take the compression nut and slide it onto the pipe. Make sure the threads face the fitting. Next, push the compression ring (ferrule) onto the pipe. Leave a small gap from the end—about 1/4 inch. Do not attach the fitting body yet. Keep the nut and ring in their correct positions. Make sure the ring slides easily and sits straight. Do not force the ring or use tools. Push it gently until it reaches the marked spot. If needed, mark the correct position with a pen. The ring must sit evenly around the pipe. Uneven placement may cause leaks. Wipe the nut and ring with a clean cloth. Remove any dust, grease, or metal shavings. Now, prepare to insert the pipe into the fitting body. Push the pipe fully until it stops. Do not leave space between the pipe end and the fitting. Make sure the nut and ring stay in place. This step ensures the parts align before final tightening.
5. Assemble and Tighten the Fitting
Insert the pipe fully into the compression fitting body. Push it until it reaches the internal stop. Make sure the pipe is straight, not angled. Slide the ferrule toward the fitting body. Thread the compression nut onto the body by hand. Tighten it until it becomes firm. Use two wrenches for final tightening. Hold the fitting body with one wrench. Use the second wrench to turn the nut. Tighten it about one full turn past hand-tight. Follow the fitting manufacturer’s instructions. Don’t overtighten or crack the fitting. Overtightening can also damage the ferrule. You might hear a slight squeak during tightening. That sound means the ring is compressing correctly. Check the alignment of all parts before finishing. The pipe should remain in a straight position. After tightening, wipe the fitting clean. Inspect it visually for cracks or misalignment. Everything should now be secure and ready for testing.
6. Test the Connection for Leaks
Turn on the water supply slowly and carefully. Watch the fitting as water begins to flow. Look for any drops or wet spots. Use a paper towel to check for leaks. Wipe the fitting and inspect the towel. If you see moisture, tighten the nut slightly. Use only small turns with the wrench. Do not overtighten. If leaking continues, shut off the water. Disassemble the fitting and inspect the pipe. Check for cracks, dirt, or uneven surfaces. Clean everything and reassemble using earlier steps. Run water for several minutes to confirm the seal. Check again after the system is fully pressurized. Mark the nut’s position with a pen to track movement. You can also install a drip tray below tight areas. Keep monitoring during the first day of use. Early leak detection can prevent water damage. Once you confirm no leaks, the fitting is good to go.
7. Maintain and Inspect the Installed Fitting
Compression fittings need occasional checks. Inspect them during your regular home maintenance. Look for water spots, stains, or green corrosion. Tighten the nut slightly if needed. Never tighten too often or too hard. If green oxidation appears, clean it gently. Use a dry cloth to wipe away residue. Fittings may loosen due to vibrations. Pipes near washing machines often shake slightly. Use clamps to support pipes and reduce movement. Don’t bend or twist pipes near fittings. That could weaken the joint or cause leaks. Keep fittings visible whenever possible. Avoid hiding them in sealed walls. Use an access panel if you need to enclose the area. If a fitting leaks often, replace it. Get a new ring and reassemble the fitting. Follow the same steps used in the original install. Proper care extends the fitting’s service life. A simple inspection can prevent big plumbing problems later.
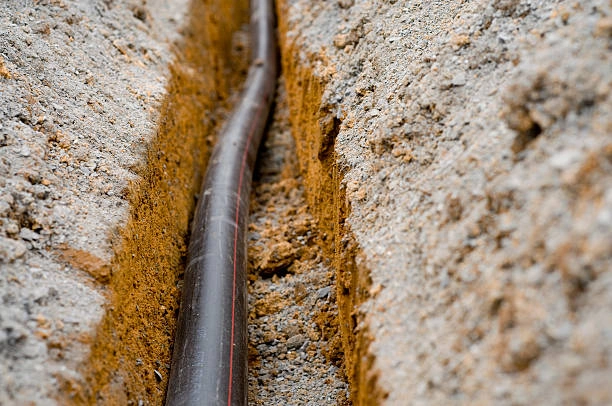
8. Use Compression Fittings in Practical Projects
Compression fittings suit many home plumbing jobs. Use them for sinks, toilets, or water filters. Install shut-off valves or replace old pipe sections. Connect faucets without solder or heat. Hook up washing machines or dishwashers easily. These fittings save time and reduce tools needed. Many homeowners use them for quick repairs. You can carry a small kit for emergencies. Include nuts, rings, wrenches, and a cutter. Compression fittings help in temporary setups. Don’t use them in hidden or underground locations. Some codes limit their use, so always check first. Measure accurately and prepare every surface. Always turn off water before working. Plan your connections to avoid bending the pipes. Keep your work area dry and clean. After installation, test for leaks right away. Watch the fittings closely for the first 24 hours. With a little practice, you can finish jobs quickly. Stay careful, follow each step, and enjoy reliable plumbing results.
Normas internacionales IFAN
Los productos IFAN cumplen con múltiples normas internacionales, lo que garantiza una alta calidad y compatibilidad global. Entre las principales normas se incluyen ISO 15875, ISO 15494, ASTM F2389, DIN 8077/8078, GB/T 18742, AS/NZS 1477 y CSA B137. Estas abarcan materiales como PPR, PVC, PE y PEX. IFAN también cumple con certificaciones regionales como NSF/ANSI 14, TIS 17-2532/1131-2535 y las normas JIS. Desde la ISO 10380 para acero inoxidable hasta la ASTM D2513 para tuberías de gas, IFAN garantiza rendimiento, seguridad y fiabilidad a largo plazo en todos los sistemas de tuberías.
Conectar
IFAN es un fabricante chino de tuberías, accesorios y válvulas de plástico con 30 años de experiencia. Si le interesan los accesorios, válvulas de cobre, tuberías y accesorios de plástico de IFAN, contáctenos. IFAN le ofrece una variedad de tuberías estándar para satisfacer sus necesidades específicas. Haga clic a continuación para obtener más información sobre la amplia gama de válvulas y sistemas de tuberías de IFAN, asequibles y rentables.
Responderemos su correo electrónico o fax dentro de las 24 horas.
Puede llamarnos en cualquier momento si tiene alguna pregunta sobre nuestra producción.
Para obtener más información, visite nuestro sitio web. https://www.waterpipefactory.com/
Por favor envíelo a: [email protected]
WhatsApp: +86 152 1588 7738