Floor heating tubes provide efficient, uniform warmth by circulating heated water beneath floor surfaces. Proper installation ensures optimal performance, energy efficiency, and long-term reliability. Follow these steps to install and use a hydronic (water-based) floor heating system effectively.
1. Plan the System Layout
Begin by designing the floor heating layout based on room dimensions, heat loss calculations, and desired temperature zones. Use a CAD program or grid paper to map tube loops, ensuring even heat distribution. Divide large areas into smaller loops (max 300–400 feet per loop) to maintain consistent water flow and pressure. Position the manifold centrally to minimize tube length variations between loops.
2. Prepare the Subfloor
Clean and level the subfloor to remove debris, nails, or uneven surfaces. Lay insulation boards (e.g., XPS or EPS foam) over concrete slabs to prevent downward heat loss. Secure the boards with adhesive or mechanical fasteners. Install a vapor barrier if required, especially in basements or moisture-prone areas.
3. Install the Manifold and Thermostats
Mount the manifold assembly (supply and return) on a wall or in a utility closet near the heating source. Connect the manifold to the boiler or heat pump using copper or PEX piping. Install thermostats or smart controls in each zone, wiring them to the manifold’s actuators for temperature regulation.
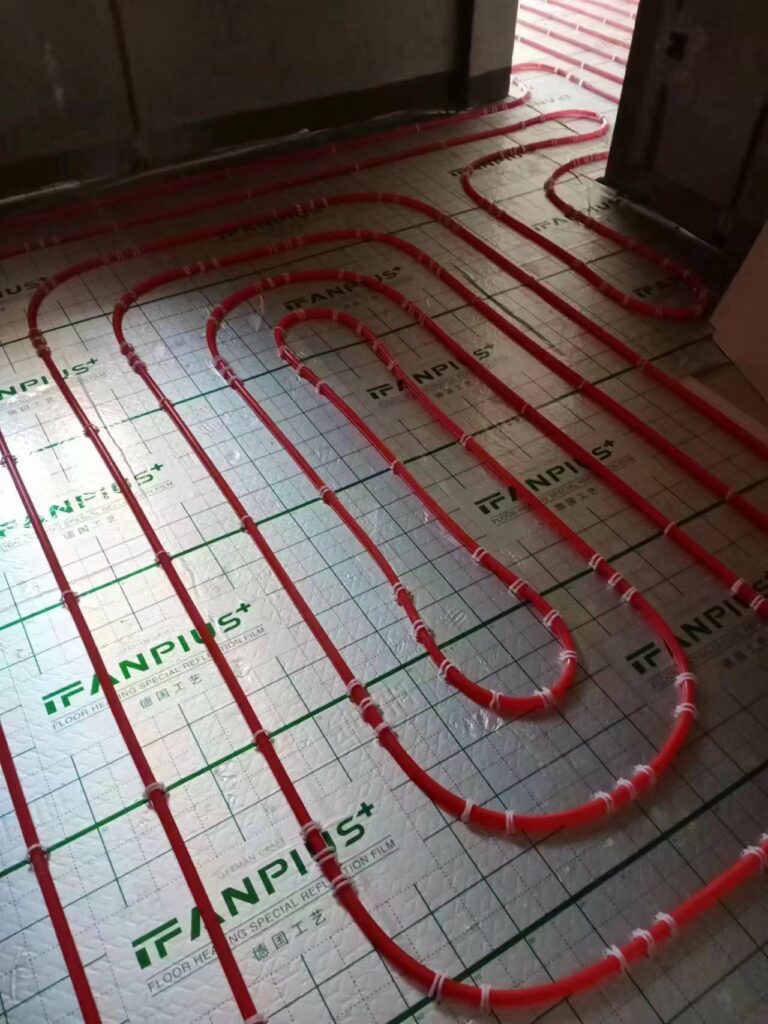
4. Lay the Heating Tubes
Unroll PEX-AL-PEX or PEX-a tubing from the manifold, following the planned layout. Maintain consistent spacing (6–12 inches between tubes) based on heat output requirements—tighter spacing for colder climates or rooms with high heat loss. Use tube clamps, staples, or pre-grooved insulation panels to secure the tubes in place. Avoid sharp bends; keep radii larger than 5x the tube diameter to prevent kinking.
5. Pressure Test the System
Before embedding the tubes, conduct a pressure test to check for leaks. Fill the system with water and pressurize it to 1.5x the operating pressure (typically 60–100 psi). Monitor the pressure gauge for 24 hours. If the pressure drops, inspect joints and tubing for leaks. Repair any issues before proceeding.
6. Pour the Screed or Concrete Layer
Cover the tubes with a self-leveling screed or lightweight concrete (gypsum-based or sand-cement mix). Ensure the layer thickness is 1.5–3 inches to protect the tubes and enhance heat transfer. Use a straightedge to smooth the surface. Allow the material to cure fully (3–7 days) before applying floor finishes.
7. Install Flooring
Choose flooring materials compatible with radiant heat, such as tile, engineered wood, or vinyl. Avoid thick carpets or solid hardwood, which can insulate heat. Follow manufacturer guidelines for adhesive or underlayment to prevent damage from thermal expansion.
8. Commission the System
Fill the system with water, purge air using manual or automatic vents, and activate the circulation pump. Gradually increase the water temperature (start at 68°F/20°C) over several days to prevent floor cracking. Program the thermostat to maintain consistent temperatures, adjusting setpoints based on occupancy and time of day.
9. Maintain the System
Check pressure gauges and valves annually for leaks or air buildup. Clean filters in the boiler or heat pump regularly. Flush the system every 3–5 years to remove sludge and maintain flow efficiency. Monitor floor surfaces for cold spots, which may indicate tube blockages or layout issues.
Key Tips for Success
- Use oxygen-barrier tubing to prevent corrosion in closed-loop systems.
- Insulate perimeter walls and under windows to reduce heat loss.
- Install a mixing valve to lower boiler water temperature for safe tube operation.
- Balance flow rates across loops using the manifold’s adjustment valves.
By prioritizing precise layout planning, leak-free installation, and gradual system activation, you maximize comfort and extend the lifespan of your floor heating tubes. Always adhere to local building codes and manufacturer specifications for materials and operating limits.
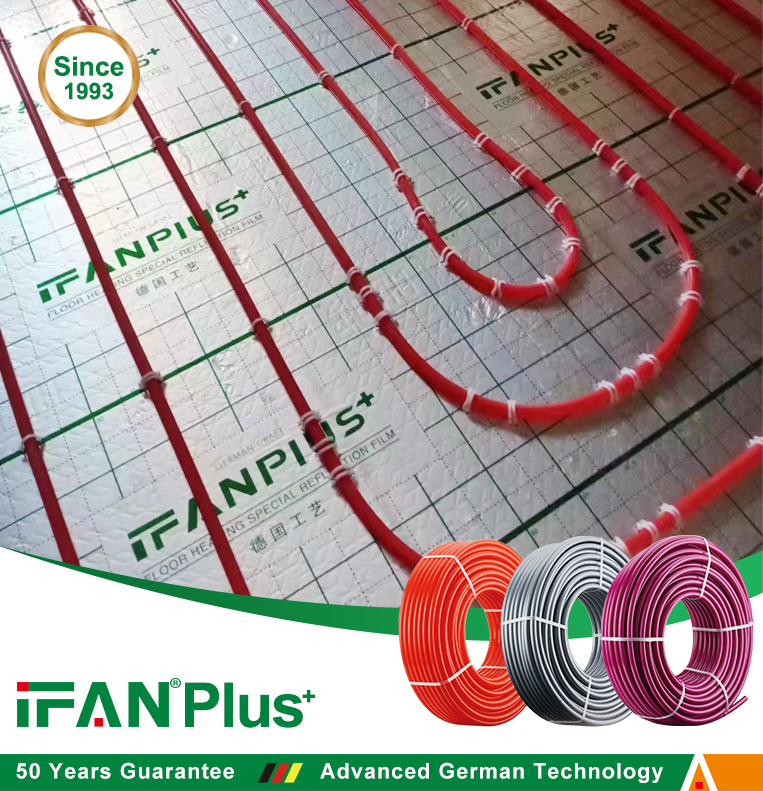
IFANPlus Floor Heating Tube is a reliable and cozy choice to provide a comfortable and warm environment for your home or commercial building.IFAN factory has 30+ years manufacture experience supporting color /size customization support Muestras gratis.
IFANPlus Floor Heating Tube is made with high-quality materials to ensure long-lasting durability and reliability. Its flexible design makes installation easy and efficient while providing even heat distribution for a comfortable atmosphere. Plus, IFANPlus Floor Heating Tube is energy-efficient and eco-friendly, making it a smart choice for any building.