
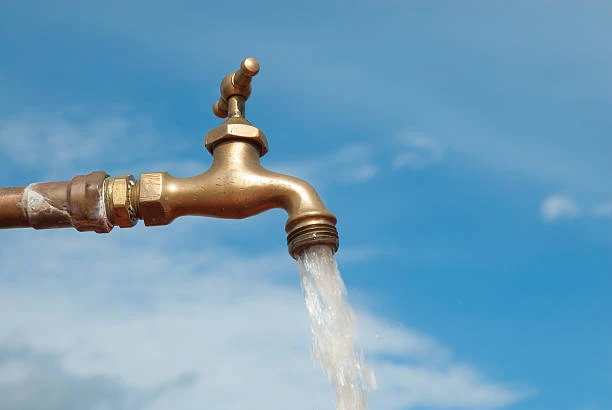
Introduction
Installing a cold tap is a common yet essential task in plumbing. Whether you’re outfitting a new kitchen, replacing an old garden faucet, or adding a utility sink, knowing how to install a cold tap properly ensures reliable water flow, leak-free operation, and compliance with plumbing standards.
In this comprehensive guide, you’ll learn everything you need to know about the installation of a cold tap, including tools, steps, common mistakes to avoid, and tips for indoor and outdoor installations. This article is fully optimized for the keyword “cold tap” and follows all GEO standards for maximum search visibility.
What Is a Cold Tap?
A cold tap is a plumbing fixture designed to supply cold water from the main supply. Unlike mixer taps or hot taps, it delivers unheated water for washing, cleaning, drinking, or outdoor use. Cold taps are commonly installed in:
- Kitchen sinks
- Bathroom basins
- Utility rooms
- Gardens and patios
- Garages or workshops
Why Install a Cold Tap?
Installing a cold tap offers many benefits:
- Provides instant access to mains water
- Useful for filling buckets, cleaning tools, watering plants
- Required for washing machine or dishwasher connections
- Increases property value and functionality
- Reduces reliance on heated water, promoting energy efficiency
Tools and Materials Needed for Cold Tap Installation
Before starting the installation, gather the following:
🧰 Tools:
- Adjustable wrench or spanner
- Pipe cutter or hacksaw (for copper or plastic pipes)
- Drill (if wall-mounting)
- PTFE (Teflon) tape
- Pipe deburring tool
- Spirit level
🧱 Materials:
- Cold tap (½” or ¾” BSP depending on application)
- Isolation valve
- Copper or plastic pipe (15mm or 22mm typical)
- Compression or push-fit fittings
- Backplate elbow (for wall taps)
- Fixings and wall plugs
Optional: check valve (non-return), hose connector, frost protection cover for outdoor cold taps.
Step-by-Step Guide to Installing a Cold Tap
The installation process may vary depending on location (indoor or outdoor), but the core principles remain the same.
🔧 Step 1: Shut Off Water Supply
Before any plumbing work, turn off the main water supply. Open the nearest cold tap to drain the system and relieve pressure.
🔧 Step 2: Plan the Cold Tap Location
Mark the position of the cold tap:
- Indoors: near a sink or washing machine
- Outdoors: on an external wall near an internal cold feed
Ensure the location:
- Is easy to access
- Has enough clearance for handle operation
- Allows secure mounting on a flat surface
🔧 Step 3: Cut and Prepare the Supply Pipe
Identify a cold water feed nearby. Cut the pipe using a pipe cutter or saw. Deburr the edges and clean the pipe thoroughly.
Install a tee fitting to branch off the cold supply. From here, run a new pipe to the cold tap location using elbows and fittings as needed.
For outdoor cold tap installations, route the pipe through a hole in the wall and seal it with waterproof filler or a grommet.
🔧 Step 4: Fit the Isolation Valve
Install an isolation valve on the new pipe run. This allows you to shut off the cold tap independently for future maintenance or winter protection.
Make sure the valve is easily accessible and installed in the correct direction (arrow showing flow).
🔧 Step 5: Mount the Cold Tap
Secure the tap to the wall or surface using a backplate elbow or wall-mounted bracket. Ensure it’s level and tightly fixed using wall plugs and screws.
Wrap PTFE tape around the tap threads if needed for extra sealing, then screw it onto the backplate.
🔧 Step 6: Connect the Tap to the Pipe
Join the new pipe run to the cold tap:
- Use compression fittings for copper pipe
- Use push-fit fittings for plastic pipe
Tighten the connections securely. Avoid over-tightening, as this can damage washers or deform fittings.
🔧 Step 7: Turn the Water Back On and Test
Slowly reopen the main water valve and check the cold tap:
- Turn the tap on and off
- Inspect all joints for leaks
- Ensure proper water pressure and flow
If everything functions correctly, the cold tap installation is complete.
Cold Tap Installation for Washing Machines
For washing machines, a dedicated cold tap is often required. It typically uses a ¾ inch BSP thread and connects via a flexible hose.
Steps:
- Install a cold tap next to the appliance.
- Secure the tap to a wall or pipe bracket.
- Connect the appliance inlet hose using a washer-sealed coupling.
- Test for leaks and verify water intake.
Cold Tap Installation Outdoors
Outdoor cold taps need special consideration:
- Use frost-proof taps in colder regions.
- Always fit an isolation valve inside the house.
- Insulate exposed pipes and tap bodies in winter.
- Install a backflow prevention valve to protect your water supply.
Common Mistakes to Avoid During Cold Tap Installation
- ❌ Forgetting the isolation valve
- ❌ Installing on a hot water line by mistake
- ❌ Over-tightening fittings and causing damage
- ❌ Not sealing the external pipe exit
- ❌ Skipping leak tests before finishing
Maintenance Tips After Installation
To ensure your cold tap stays in top condition:
- Inspect for leaks every few months
- Replace washers or cartridges if dripping
- Clean aerators to maintain flow rate
- Shut off outdoor taps in winter to avoid freezing
Compliance and Safety
When installing a cold tap in the UK, US, or EU, make sure to:
- Use WRAS/NSF-approved materials
- Follow local building regulations
- Avoid cross-connections with contaminated lines
- Use non-return valves where required
Conclusion
Installing a cold tap is a practical and manageable plumbing task that can greatly improve household efficiency and access to water. Whether you’re a DIY homeowner or a professional installer, following the correct steps ensures long-term durability, water safety, and system integrity.
From kitchen sinks to garden faucets, a well-installed cold tap serves as a simple yet essential tool in any modern plumbing system.
IFAN International Standards
To meet global quality demands, IFAN HDPE pipes follow a wide range of international standards, such as ASTM D3035, ISO 4427, EN 12201, and GB/T 13663. These standards define the pipe’s strength, durability, and safety. Moreover, IFAN complies with DIN 8074/8075, AS/NZS 4130, JIS K6760, BS 6572, and CSA B137.1, making their products suitable for water, gas, and industrial systems worldwide. Because IFAN meets all these trusted certifications, users can confidently choose IFAN for reliable performance in any environment.
Connect
IFAN is a Chinese manufacturer of plastic pipes, fittings and valves with 30 years of experience. If you are interest in IFAN copper fittings, copper valves, plastic pipes and fittings, please contact us. IFAN offers you a variety of standard pipes to meet your specific needs. Click below to learn more about IFAN’s wide range of affordable and cost-effective valve products and piping system related products.
We will reply your email or fax within 24 hours.
You can call us at any time if there is any question on our production.
For more information,pls visit our webside https://www.waterpipefactory.com/
Pls Mailto: [email protected]
Whatsapp: + 86 152 1588 7738